# Creating an API Request
In the second step of the creation process of a Custom Action you will have to configure the API Request that you want to set up.
This screen is separate into 2 major parts:
- To the Left, from the top:
- API Base URL
- Method
- Header & Query Parameters
- Body where you can add your JSON text.
- To the Right:
- Inputs
# API Base URL
The API Base URL is the endpoint of the request.
- Choose an API function from our API Reference.
- Copy the API Base URL and paste it in the corresponding field in Adalo.

# Method
All Abracadalo APIs use the POST method.

# Headers & Queries
In this section you will add your Authentication Credentials (API Key) and the Parameters that you will need in order to use your desired API function. By clicking on + ADD ITEM you will see two options: Header and Query Parameter.
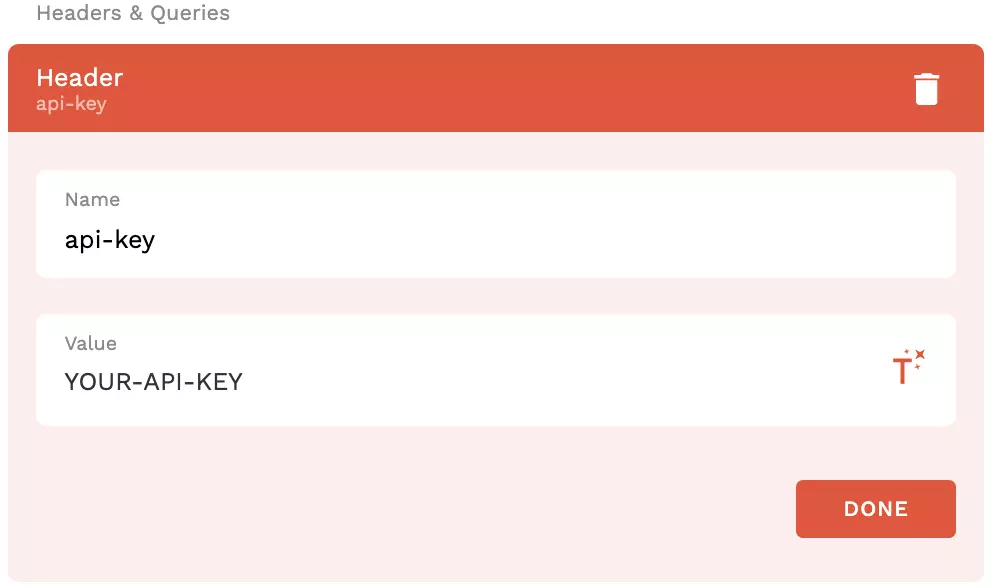
# Step 1: Add Your API Key Header
You will create a Header in order to authenticate your API request.
Create a Header to set your API key (Name: api-key) and authenticate your request. Click here for more details.
# Step 2: Attach Parameters
Some API functions, like Random Quote, do not require you to attach any parameters. In this case you can just move on! But most APIs will have at least one parameter for you to specify. For each parameter, create a Query Parameter.
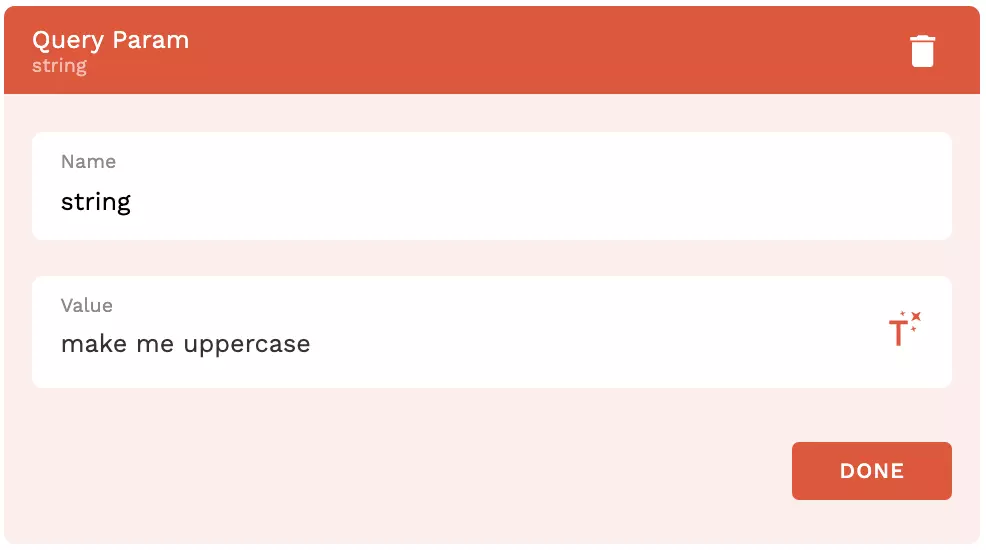
You can also change the value of a parameter dynamically by using Inputs.
# Body
Leave this empty! At Abracadalo, our goal is to simplify the set up as much as possible, that is why we do not use this section. Everything is pre-fabricated.
# Finalize the Action
In order to finalize the action and persist its configuration, click RUN TEST REQUEST at the bottom of the panel. This at the same time gives you the chance to see if your query succeeded.
If your action succeed, you should see a response similiar to this containing one or multiple outputs:
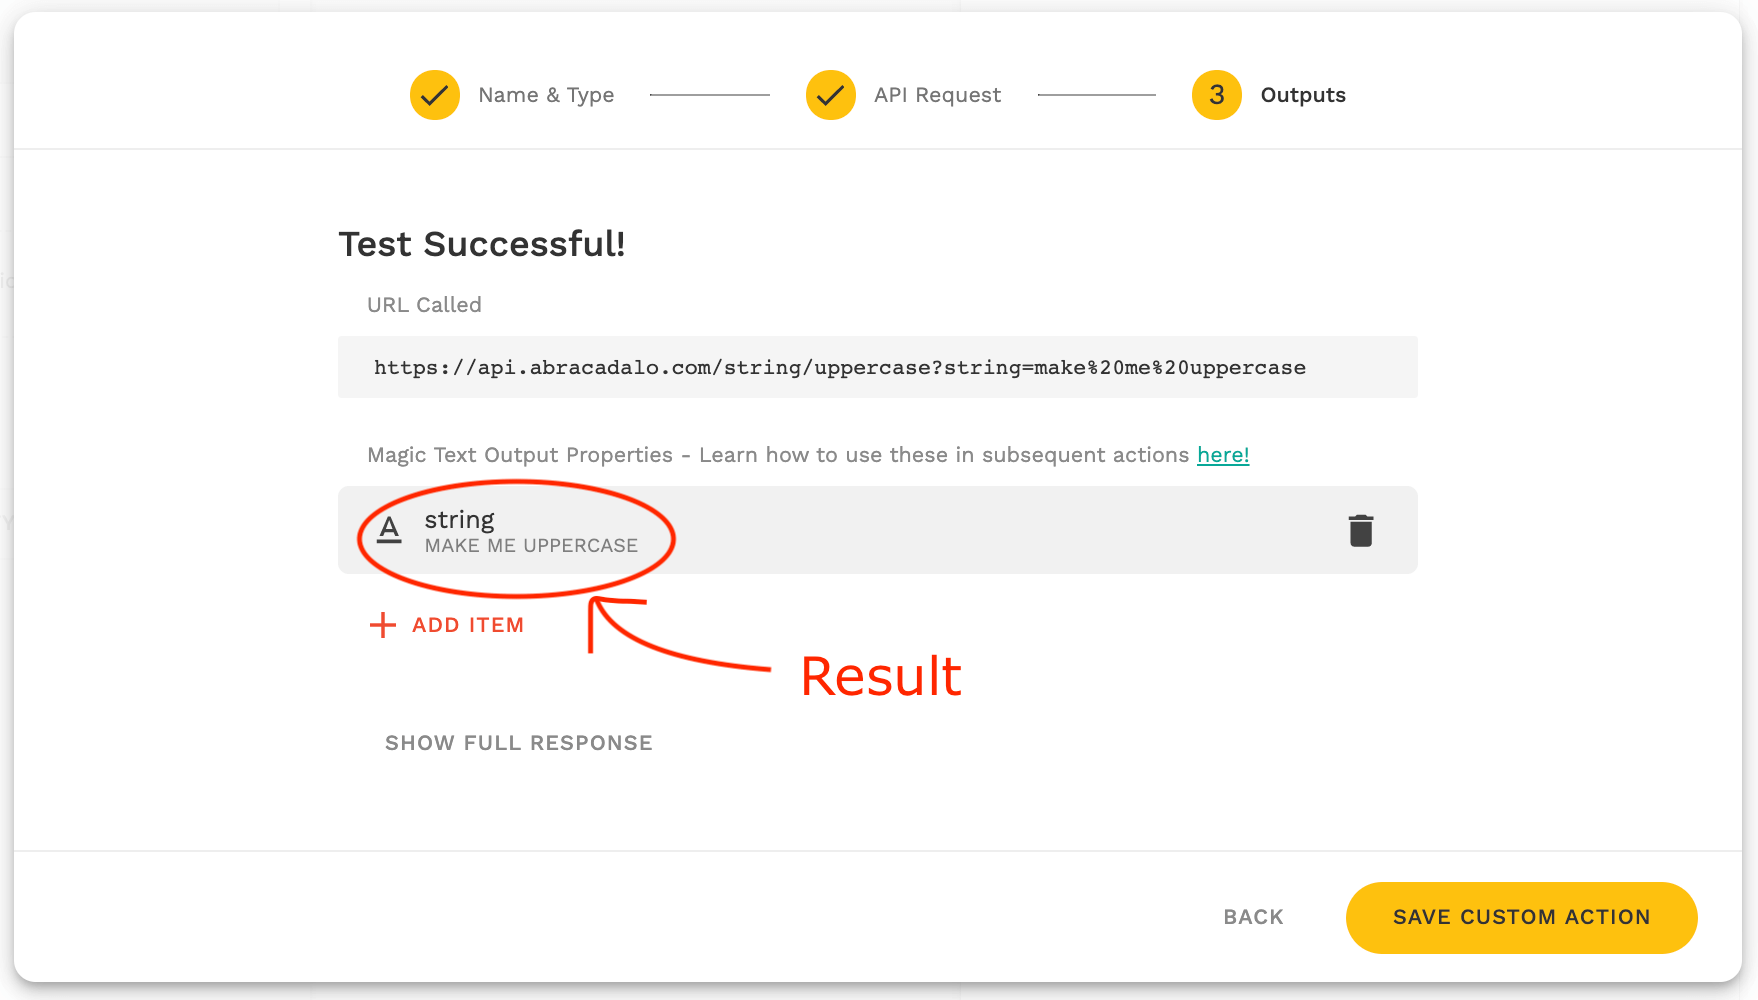
🎉 You can now further use and process the resulting outputs in other parts of your app. Learn more.
You might also have experienced an error. In this case it is important to pay attention to the error message. From the error in the following screenshot we can understand that a Query Parameter with the key string was missinng from the request.
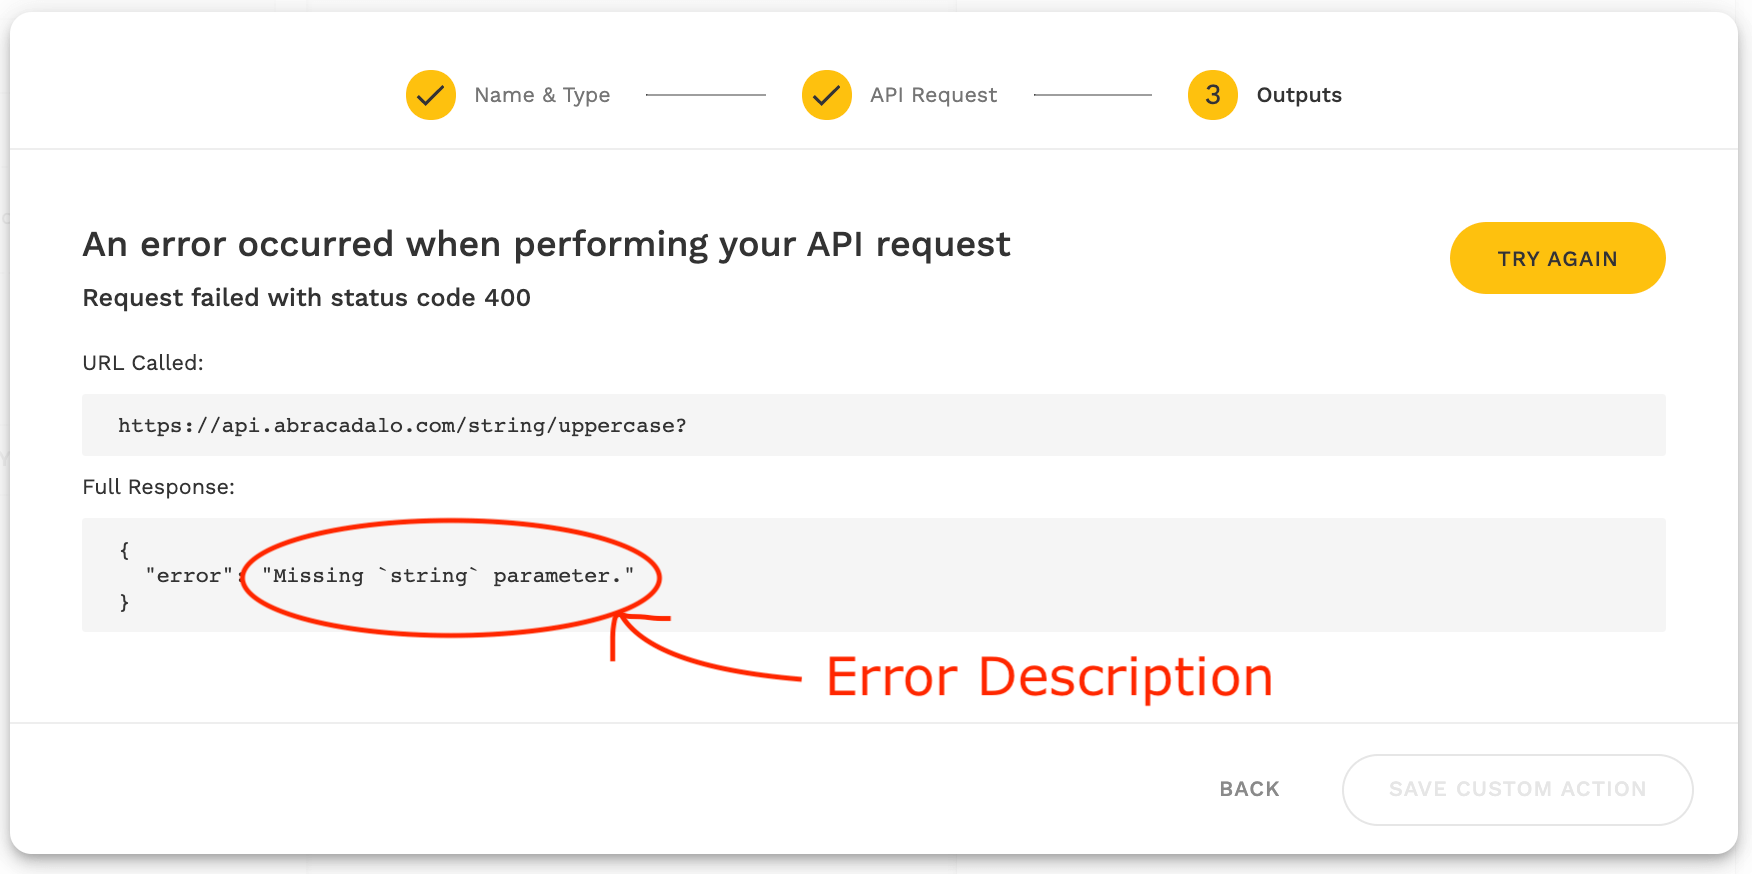
We can now go back, adapt our configuration, and test the query again.
If everything succeed, we can now finalize the action by clicking SAVE CUSTOM ACTION. The custom action configuration will now be stored in your Adalo account and you will be able to find and bind it to various events.
# Using Inputs
In order to be able to use the same API in different situations within your app without having to reset it every time you can add Inputs. This will allow you to change the value of a parameter automatically.
- Go to the right section of the page and click on + ADD ITEM under Inputs.
- Select the type of Input that you want (Text, Number and Date & Time).
- Under Name (of the Input) write the name of the parameter.
- Go back to the Query Parameter that you have created in the Headers & Queries section.
- Select the parameter with the same name as your Input.
- Under Value, click on the Magic Text icon.
- Select the Input with the same name.
TIP
The name of the inputs does not affect the API. We recommend that you give the parameter the same name to make it easier for you to find it.
# Using Outputs
Nothing here yet. Check again later or head to the Adalo documentation (opens new window).